The stall turn is a magnificent aerobatic figure. It looks graceful and elegant when flown well but is actually very challenging to fly perfectly and the further up the aerobatic ladder you go, the more challenging it becomes with ever more difficult embellishments and energy management issues. The vanilla stall turn has a k factor of 17, making it one of the higher scoring figures, consequently if you aim to win at club or Sports level, mastering this figure is essential.
It takes time to master – the vertical lines must be vertical, counteracting the torque of the engine as you slow down and you must insure the airspeed reaches zero before applying full rudder at the top so that the turn is not ‘bridged’, whilst applying control inputs to counteract the gyroscopic effect of the engine in the turn.
The real secret to success is seeing what is happening and to do this you must look in the right place. Remember that the horizon provides your main reference so you should be devoting your attention to the wing tips so you can see if you are vertical, yawing or rolling. Given practice you will find your entire attention is spent looking and the movement of the controls becomes natural.
Judging Criteria
Up and Down lines
Must enter from truly level flight and on axis
Part loops must have constant radii (may be different in size)
Vertical lines must be ZLA vertical throughout
Aircraft must stay on axis – no roll
Wings must remain level (no yaw)
Any rolls must be correctly centered (rolls are judged on flight path CGT)
If the exit is on the A axis, then it must be in the correct direction and in erect or inverted flight as required by the sequence.
The turn itself
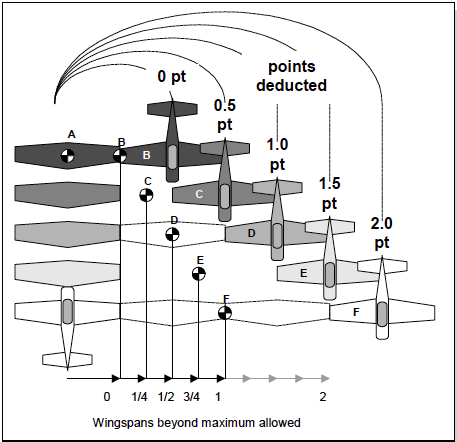
The centre of the turn must remain within one wing span (no bridging)? ( the downgrade is 1 point per half a wingspan)
The turn must remain in the correct plane – no pitching
Must not roll at all during the turn (torque’ing)
What is not judged
The rate of the turn – slow or fast
The lengths of the up and down lines
Downgrades
Vertical lines, 1 point per 5 degrees error
Any pitch or roll error attracts 1 point per 5 degree
Bridging attracts a downgrade of 1 point per half wingspan
If part loops do not have constant radii, then downgrade as per loops
How to Fly a Stall Turn
The Stall Turn is a figure that needs to be taught by an experienced instructor. It is quite normal in the early phases of learning for the instructor to have to assist in recovering the situation!
Airmanship Points:
For the initial few stall turns a height of 3,000 to 3,500 feet agl is required so that the instructor can let the student recover if things go astray and yet still have sufficient height to sort things out if the student is unable to. In addition to all the normal HASSLE checks, make sure cloud base is sufficiently high so that you don’t end up in cloud for the turn!
Method:
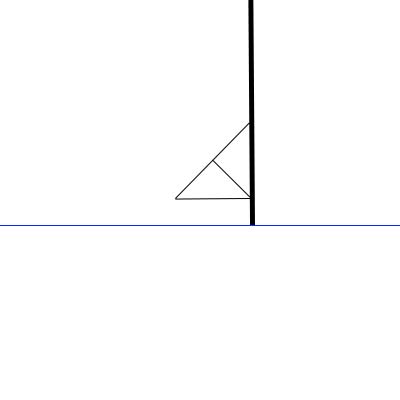
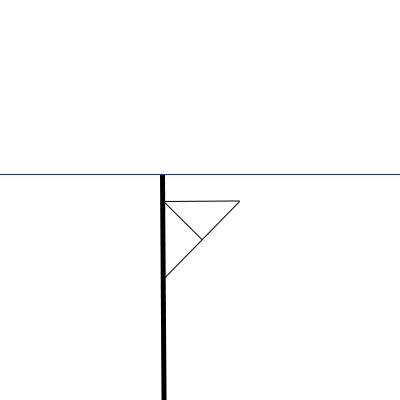
Pull to the vertical whilst looking at the wing sight. Once you are properly vertical in pitch and yaw, keep looking at the wing sight and adjusting controls so that you stay vertical. This normally involves gently applying right rudder and forward stick.
When the aircraft stops, determined by feel or looking at adjacent clouds or by wool tufts or in the early stages by your instructor telling you, apply hard and full left rudder (for Lycoming powered aircraft). You then need to keep the aircraft in the vertical plane while it turns. Gyroscopic forces and propeller effect will be trying to pitch the nose up and the torque will be trying to make it roll to the left. Normally in an Extra full right aileron is applied part way around the turn followed by significant forward stick. The important point is that you keep looking at the horizon and apply whatever controls are necessary to keep the aircraft in the correct plane.
As the aircraft approaches vertical down, use right rudder to stop it swinging beyond the vertical.
Keep your eyes pinned to the wing sight and ensure it remains truly vertical in pitch and yaw.
When speed is sufficient, pull to the horizontal drawing a constant radius part loop.
Common Mistakes:
Kicking too early
May result in flick/spin type departure
Will result in bridging
Kicking too late
May damage aircraft controls (check before flight if your aircraft is cleared for tail slides!)
Hold controls tight and wait for the nose to overtake the tail (may be violent)
Don’t allow a huge tail slide to develop!
Keep the power on!
Not keeping the aircraft vertical
In pitch
In yaw
Keep looking at the wing sight!
The judging criteria has been taken from CIVA Section 6 part 1 PDF from the CIVA website
If you have any question, please comment below and we will answer it as soon as possible. To book an aerobatic flight, contact Adrian on Adrian.Willis@BritishAerobaticAcademy.com or call or message him on 07712864413.
We use cookies on our website to give you the most relevant experience by remembering your preferences and repeat visits. By clicking “Accept”, you consent to the use of ALL the cookies.
This website uses cookies to improve your experience while you navigate through the website. Out of these cookies, the cookies that are categorized as necessary are stored on your browser as they are essential for the working of basic functionalities of the website. We also use third-party cookies that help us analyze and understand how you use this website. These cookies will be stored in your browser only with your consent. You also have the option to opt-out of these cookies. But opting out of some of these cookies may have an effect on your browsing experience.
Necessary cookies are absolutely essential for the website to function properly. This category only includes cookies that ensures basic functionalities and security features of the website. These cookies do not store any personal information.
Any cookies that may not be particularly necessary for the website to function and is used specifically to collect user personal data via analytics, ads, other embedded contents are termed as non-necessary cookies. It is mandatory to procure user consent prior to running these cookies on your website.
 Adrian Willis